Postman and API testing are both large topics and so this post is intended to give testers just a basic understanding of API testing, an introduction to Postman and how to quickly get started testing APIs.
What is Postman?
Postman is a powerful HTTP client for testing web services. Postman makes it easy to test, develop and document APIs (Application Programming Interface) by allowing users to quickly put together both simple and complex HTTP requests. Postman is available for Mac, Windows and Linux. Postman can be downloaded here: https://www.getpostman.com/apps.
Why test APIs?
Although UI (User Interface) tests help us repeat repetitive tasks which mimic the end user, these tests can be time intensive to create, maintain and execute. By testing the API in isolation, this can be done with relatively far less lines of code, be less complex to implement and maintain since the code base is many times bigger than API level tests for instance.
Often much of the business logic can be difficult to replicate testing from the UI level alone. The AUT (Application Under Test) may require very specific and detailed environment settings to trigger a line of code on the business layer for instance. To perform even small tasks on the UI takes a lot of time compared to API level or unit level tests.
It’s also very important to understand that from UI testing alone you will NEVER get a 100% test coverage and so the more tests you have to test the application the better!
Creating a new Postman Collection
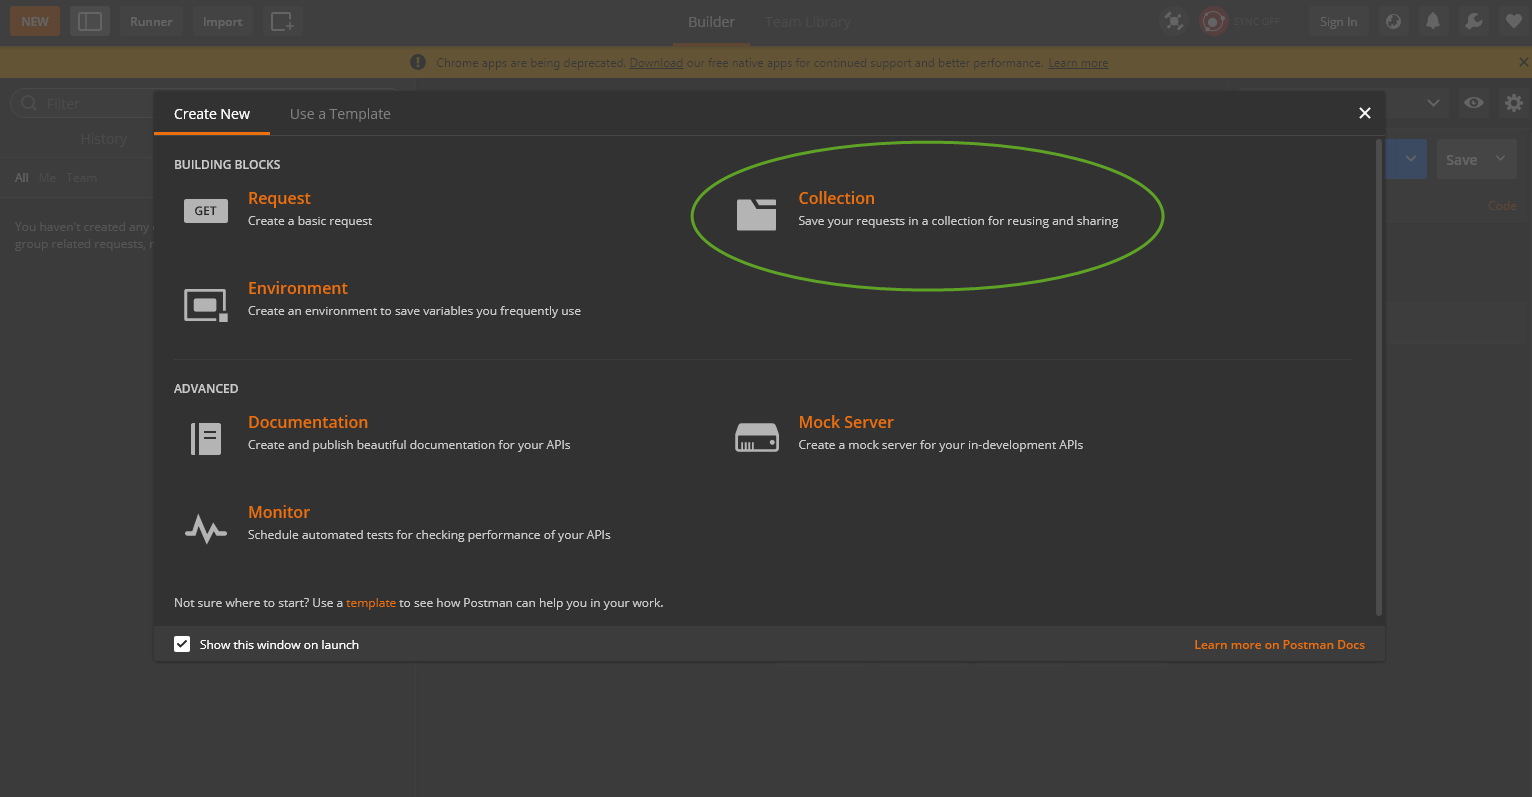
Assuming you have installed Postman, open the application on your computer. You will be initially prompted with the following screen.
To start select ‘Collection’.
A Postman Collection lets you group individual requests together. You can organise these requests in folders. Information on collections can be found by visiting the official documentation: https://www.getpostman.com/docs/v6/postman/collections/creating_collections
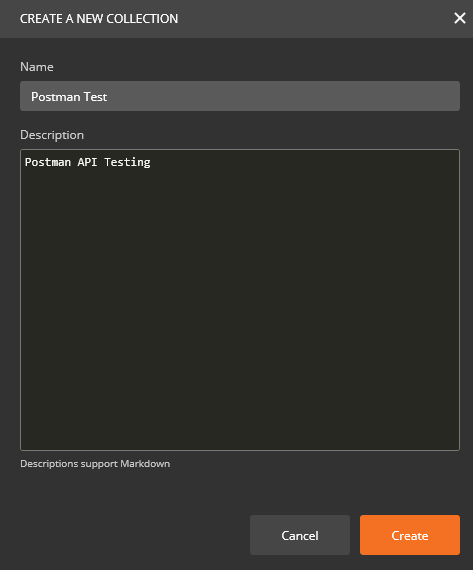
Give your new collection a meaningful name and description. This information can also later be used if you wish to generate documentation for your tests.
Creating our first test
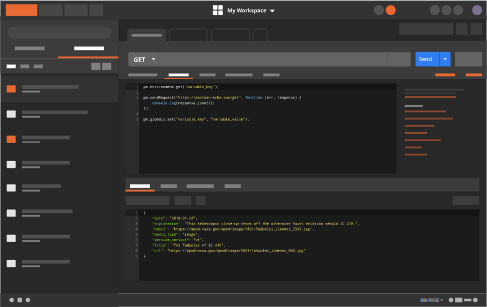
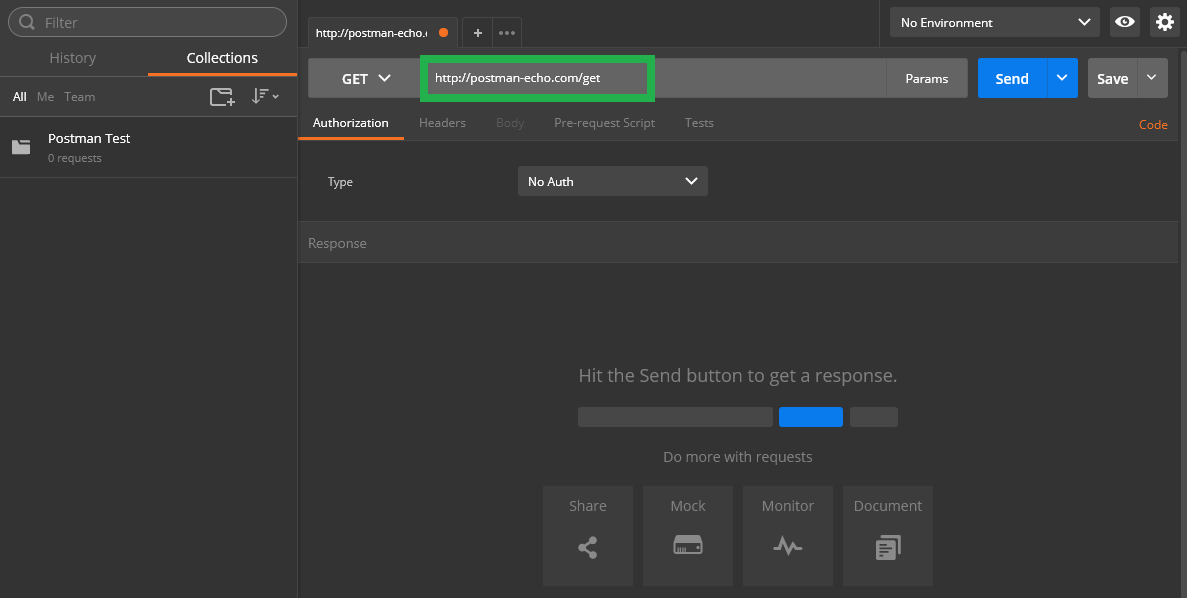
For this post we will be testing against the Postman test site http://postman-echo.com/get
The first test that we will create is to check that the API is active and able to receive requests.
Copy the above URL and paste it into Postman into the input field which states, “Enter request URL”.
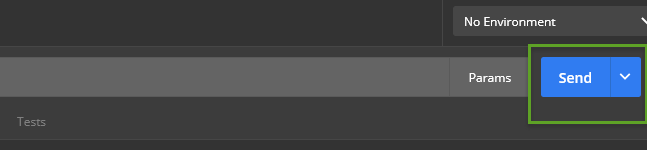
Next click on the blue ‘Send’ button.
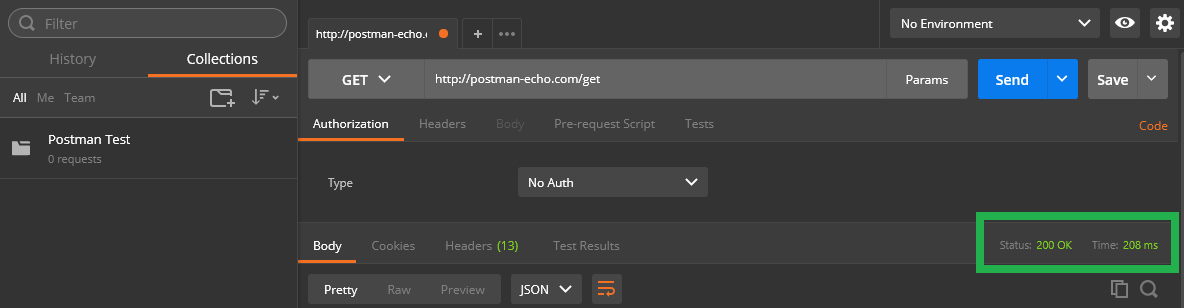
You may have noticed we got a ‘Status: 200 OK’ displayed which means the request was successful.
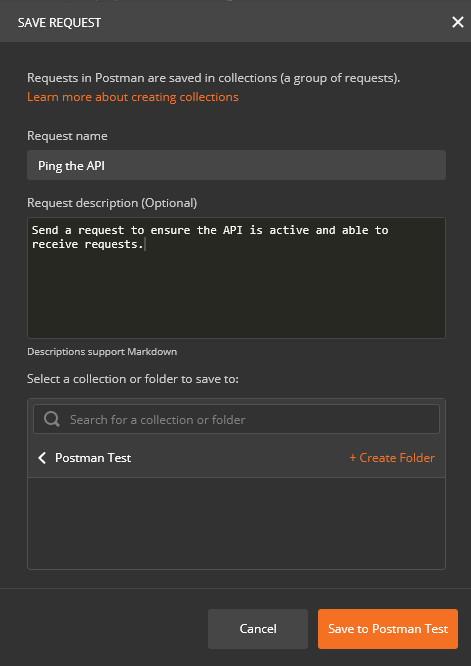
Now we’ve written our first test we will want to save this to our collection so that we can re-run this test at any point to ensure the API is still alive and able to receive requests. Click on the ‘Save’ button and you will be prompted with a new window

Give your request a meaningful name and description as these will help us understand what our tests are doing as well as provide great documentation. Select our new Collection we created by left clicking on it and then press the ‘Save to Postman Test’ button.
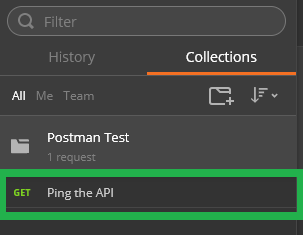
Once saved, if you expand your Collection on the left-hand side of Postman you will notice your newly created test is now displayed within your Collection.
Creating tests for the API test
Now that we’ve written our first API test, wouldn’t it be good if we could have tests to ensure that it is working as expected?
With your newly created test still open within Postman, click on the ‘Tests’ tab. Here is where we will place our tests.
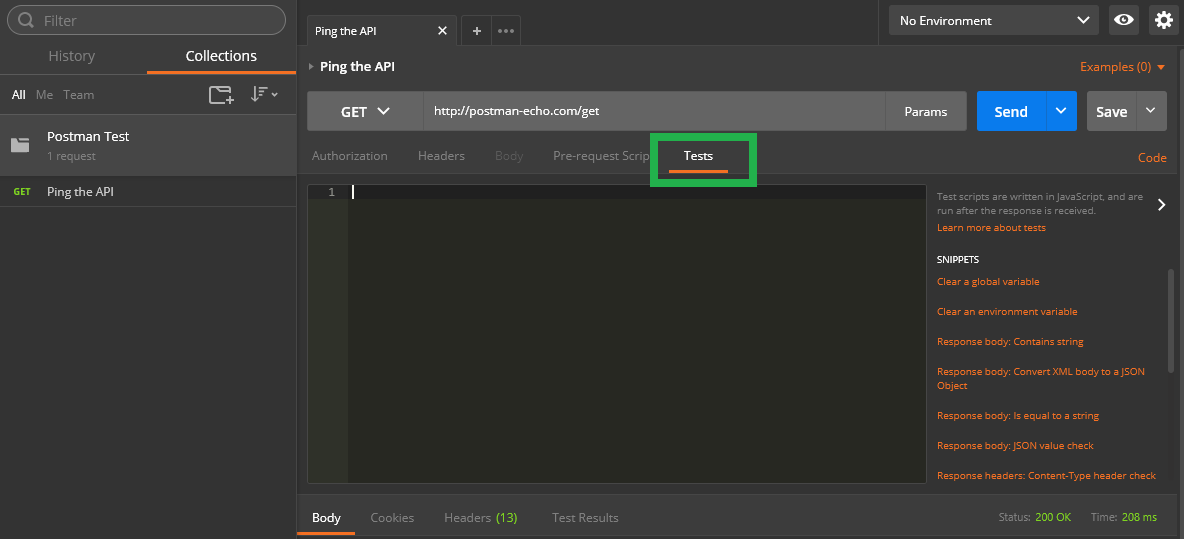
A Postman test is essentially JavaScript code executed after the request is sent. On the right-hand side of the ‘Tests’ window you will also see a ‘SNIPPETS’ window. Here you can access some tests without writing any code!
Scroll down the list of ‘SNIPPETS’ and left click on ‘Response time is less than 200ms’ and then left click on ‘Status code: Code is 200’. Both tests will then be added to your ‘Tests’ window.
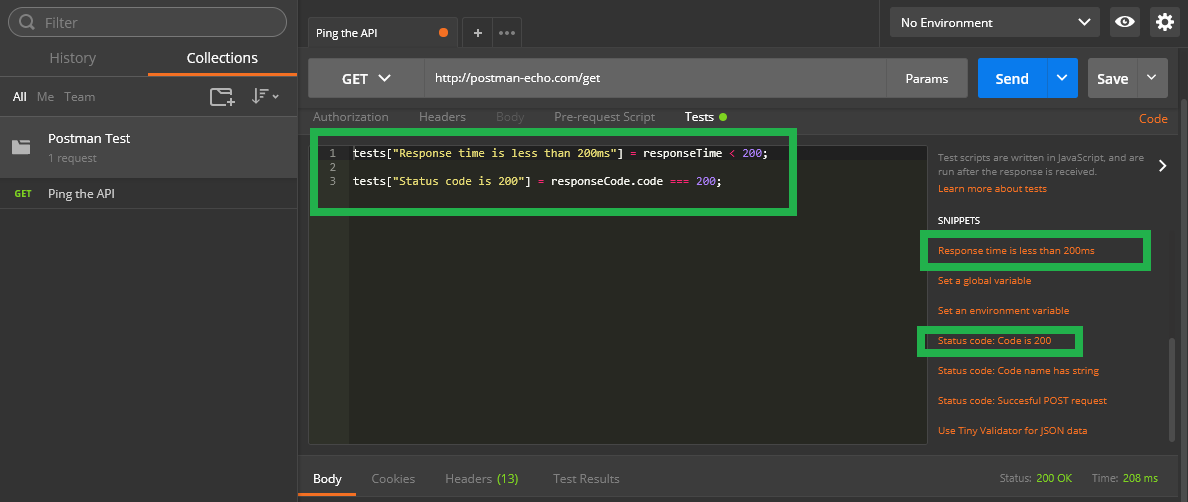
Click the blue ‘Save’ button to add these two new tests to our request and then press the ‘Send’ button to re-run our API test.
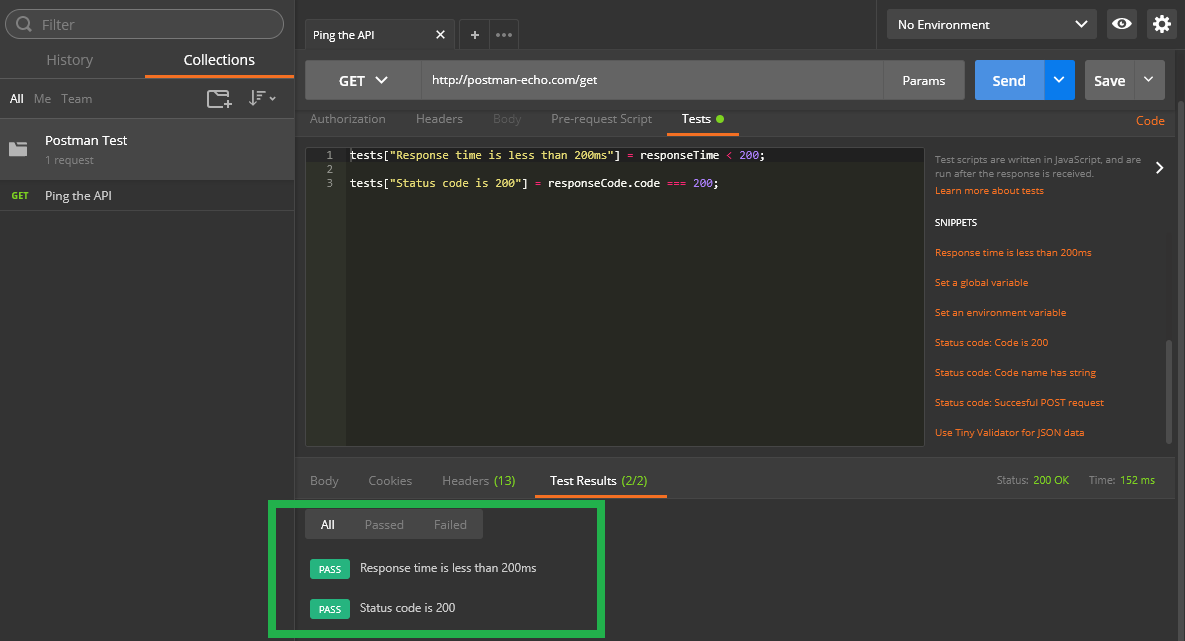
When the request has been sent you will notice the ‘Test Results’ tab now shows ‘Test Results (2/2)’. Click on this tab and you will see information on which tests passed.
Environments
While working with APIs, often you may need to run your tests both locally and then on an environment. Having environments defined within Postman enables you to quickly switch between setups without having to change your API requests.
An environment is a set of key-value pairs. The key is the name of the variable and the value is what you would use as part of your request. These variables can be used not only to store for example a URL (which can then be swapped) but also other information you may need for your tests.
These environments once created can be saved as JSON files and exported for other users to be able to use.
How to set one up
Very quickly before we create a new environment, copy the request URL (without ‘/get) from your test to the clipboard as we will need this in a minute.

In the top left-hand corner of Postman, click on the ‘Cog’ icon. Next click on ‘Manage Environments’.

Next you will be shown a ‘MANAGE ENVIRONMENTS’ window. Click on the orange ‘Add’ button.
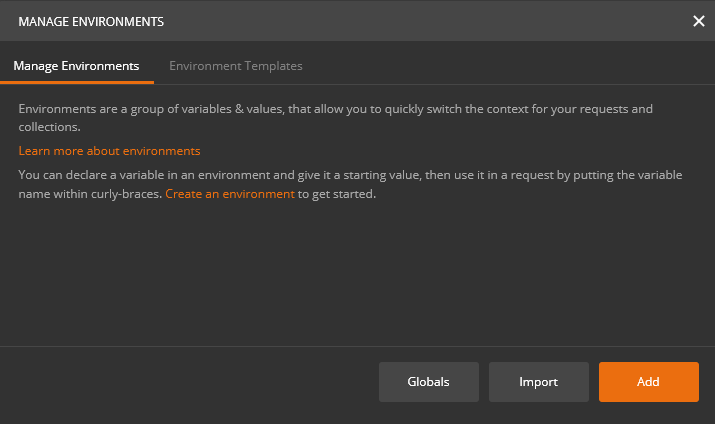
Next give your new environment a meaningful name, i.e. ‘Production’ or ‘Local’.
Underneath your environment name you will see a table with ‘Key’ and ‘Value’ displayed. In the input box which states, ‘New key’, add a new key called ‘baseUrl’ and then next to it in the ‘Value’ column paste the URL which we copied to the clipboard at the start of this section ensuring you include the http:// at the beginning. Once you’ve added the new key-value pair click the orange ‘Add’ button.

Close the ‘MANAGE ENVIRONMENTS’ window by clicking the ‘x’ in the popup window.
Updating our first test to use the environment settings
In the top right-hand corner of Postman, you will see a drop-down list which shows ‘No Environment’. Click this drop-down list and select ‘Production’, this will let our collection know to use this environments setting.
Next, we need to update our test to use the ‘baseUrl’ configured for this environment. Next to the ‘GET’ drop down where we have our request URL, remove the ‘http://’ Up until ‘/get’.
Before ‘/get’ write {{baseUrl}} and then click on the ‘Save’ button. You will now see that part of the request URL has turned orange. This means that our test is now using the baseUrl key-value which we created for the environment which we have selected.
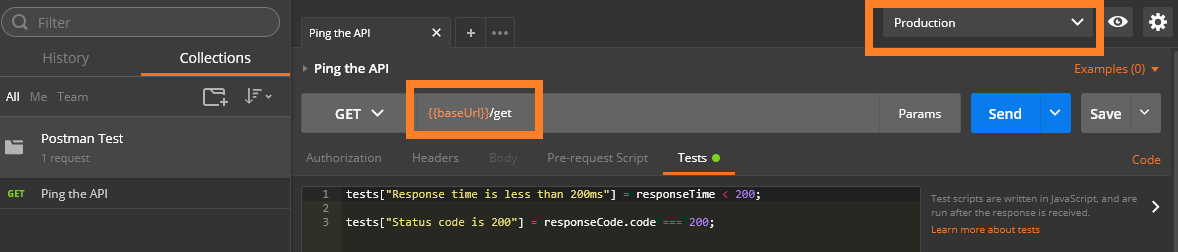
Click on the blue ‘Send’ button to ensure everything works!
How to find available endpoints to test
Most often developers will give you all the information to know what endpoints should be tested and what parameters need to be provided to test the API. Sometimes though you may feel you are missing information or may want to dig a little deeper and so it’s very useful to be able to know where to look to see what’s going on in the code.
If you wanted to know what endpoints were available for the API you would need to look within the Controllers for the API project. A ‘Controller’ is used to define and group a set of actions. An action (or action method) is a method on a controller which handles requests.
How to find out what parameters may be required
Using the above section as an example, once you know where some of the requests live you can start to work out what each request is doing. As you start to create tests for each request you could simply put break points on the requests you have an interest in and then run through the aplication. This way as you navigate through the web application you can inspect what parameters are being sent as each request is being made which you can then use in your tests.
If the parameters being passed back and forth between requests are repeatedly the same, you may want to put these in your environment key-values to make tests cleaner and easier to maintain.
Collection Runner / Load Testing
The collection runner gives you the ability to run your collections as many times as you wish at the click of a button.
The collection runner runs requests in a collection in the order in which you set them. It also runs tests for every request and gives you an aggregate summary of what happened. It stores all your test runs so you can compare them and see what has changed.
Running a collection
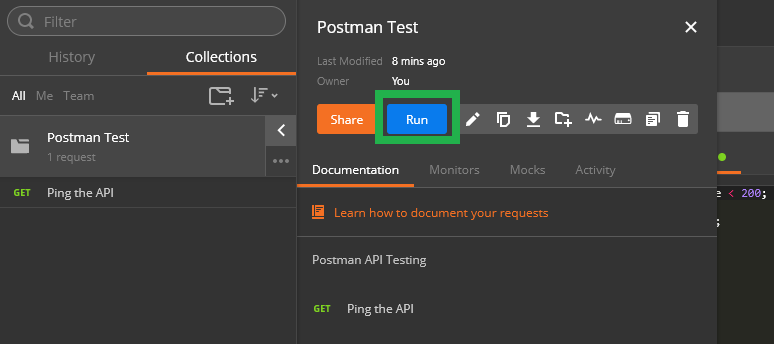
On the left-hand side of Postman next to your Collection, click on the arrow pointing right.
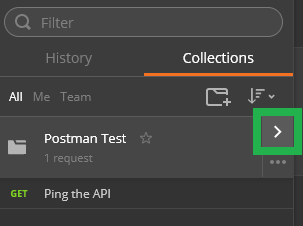
Next click on the blue ‘Run’ button.
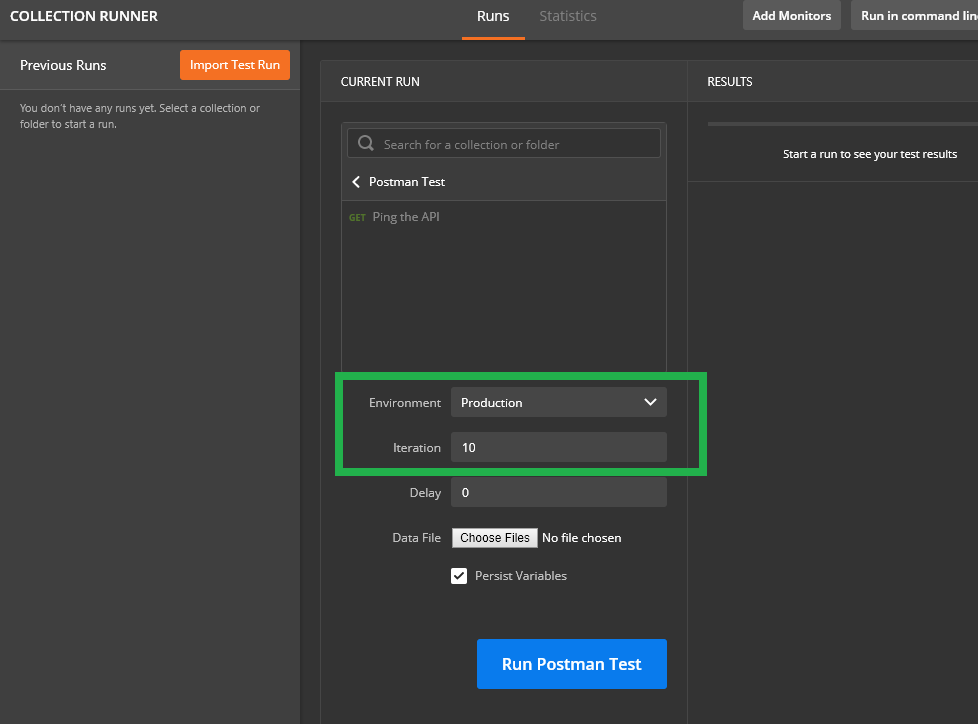
Now you will be shown a new window where you can specify specific tests or all tests you have created within a collection.
Next to ‘Environment’ select your environment ‘Production’, next to Iteration input 10 and then click the blue ‘Run Postman Test’ button.
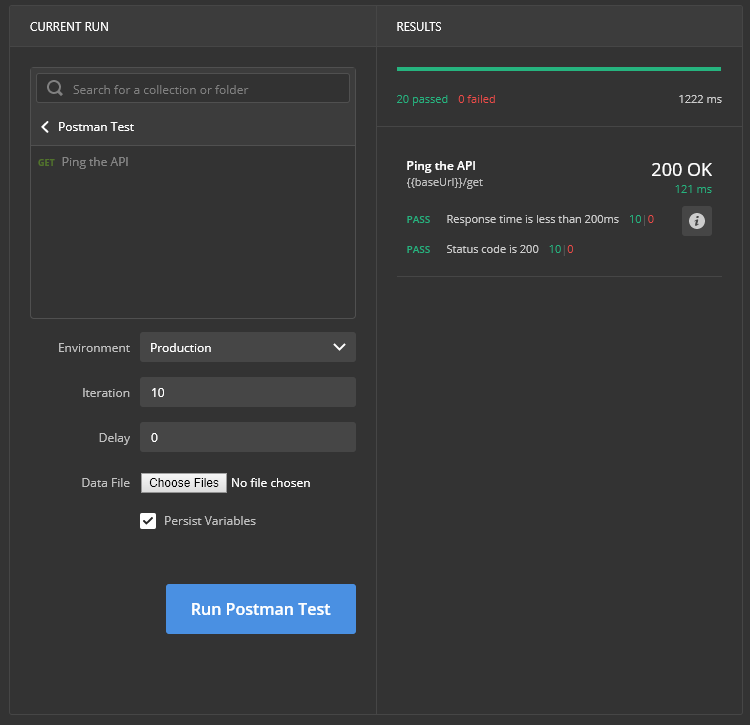
As your tests run you will be shown your results. For each request that is made you will see whether the request was successful and any request tests you have created will be run and the results of those also will be output for each request which is run.
Generating Documentation
Generating documentation with Postman’s built in service has some limitations but if you would like to look you can follow the steps below. There are however many projects on github.com which allow you to export your tests and create documentation for free.
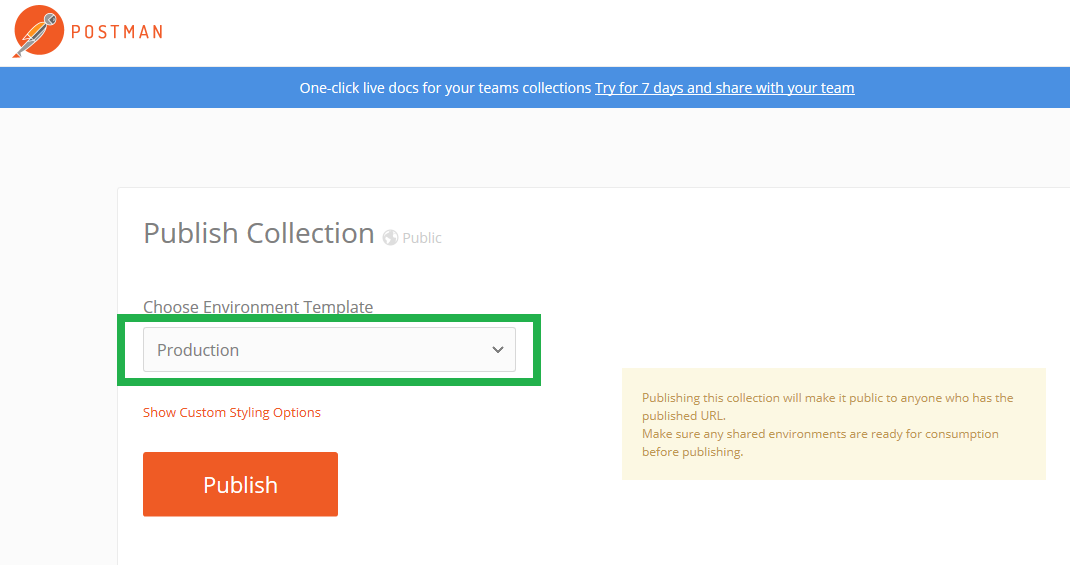
On the left-hand side of Postman next to your Collection, click on the ‘…’ and then select ‘Publish Docs’.

If you do not have an account, you will be requested to ‘Sign in to Postman’. Once signed in you will be taken to a new screen where you will be prompted to ‘Choose Environment Template’. Select ‘Production’ and then click on the orange ‘Publish’ button.
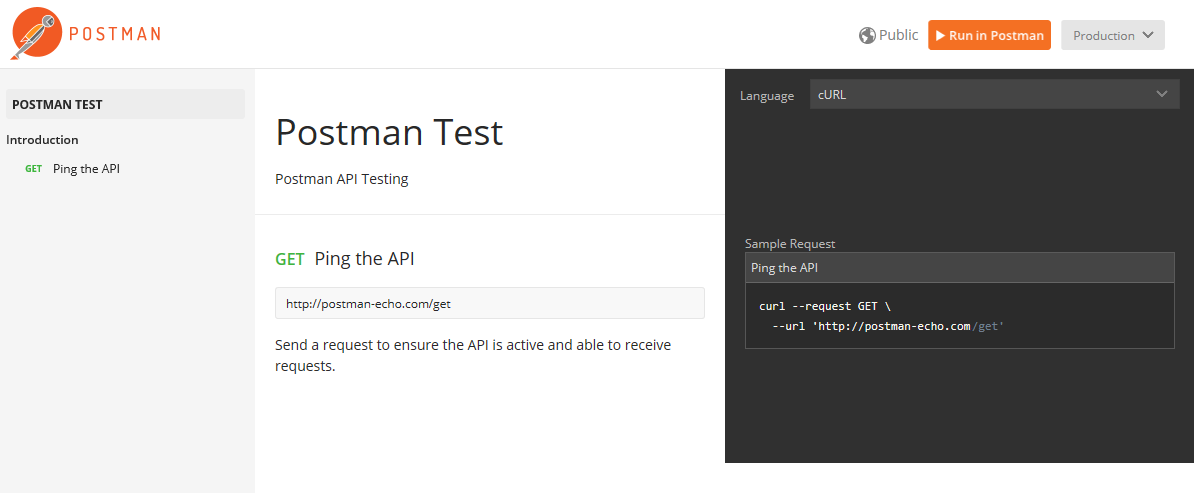
Once published you will be shown a URL where your documentation has been published to. Click on the link to view your documentation.
Taking things further
If you’d like to try some more advanced testing, check out the documentation on the Postman website https://www.getpostman.com/docs/v6/